The Loading Lever
 I designed a replacement loading lever using my academic copy of Solid Edge v11. It almost mirrors the original, except, because I no longer use the upper lever also, there can be a bit more material. This will be made out of aluminum to improve rigidity also.
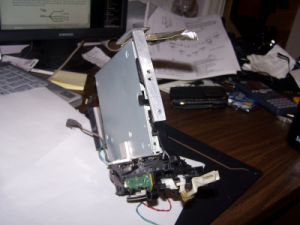
The data CD/DVD jukebox
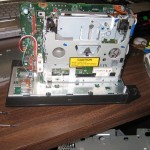
I was always fascinated with those large cd changers when they were new; but, they were always expensive. Plus, with no more than 50 to 100 audio CDs, they aren’t that useful to me – it’s much easier to carry around compressed copies. I had seen SCSI 4×4 disc changes in standard 5.25″ form-factor, and had seen tape drive autoloaders as well. I ended up getting a line on a non-working 101 audio disc changer. I could now build a prototype.
When I first envisioned this project, hard disk storage was still relatively expensive; I had 20Gb and 30Gb drives, the later had just been purchase at a cost of over $300CAD. Compare this to buying good quality CD-R discs in bulk at $0.15/ea. Hard drive storage was running ~$10/GB, while CD-R storage was ~$0.22/GB – not accounting for the cost of a CDR drive, or considering the relative frailty of the media.
The obvious main difference between the storage schemes boiled down to access speed, latency, write speed, media handling, and the amount of data you can have online at a time. I didn’t want to have to handle CD-R discs, risking damage, and, I didn’t want to have to swap them in or out often. While filesystems such as mediadatabase or hierachical storage file system exist, and could be used (or modified) to run an active filesystem on such a device, the extreme latency, low access speeds, and small capacity of single discs make this a less than perfect option. However, a device such as this is well suited as an automated backup system – the 101 disc change would hold 70.7GB on CDR before compression. The option to simply upgrade the unit to a DVD-R (or dual layer) drive when cost effective would further expand the backup capacity to 474GB (or 949GB)! Needless to say, years after the initial idea, I was still thrilled to redesign the disc changer robotics to accommodate a highspeed data drive and computer control.
For the prototype, I used the CDRom drive from an old-style slot loading iMac – slimline drives were much easier to mount to the jukebox. The only change to the drive was an external connection to the “disc inserted” sensor, allowing loading to be triggered at will — using an external sensor, this allows loading discs from wider aproach angles. This can be triggered through the jukebox’s own loading mechanism when it goes to load a disc.
At this point, I have temporarily stopped work on the control system, after dropping the new drive mechanism, breaking a critical part. I will machine (or scrounge) a replacement eventually.


 I’ve never been a morning person. But, I’ve found the best way to wake up is with natural light. These indoor solar simulators hold no candle to the bright sunlight on a clear morning. My solution was an alarm clock to draw back the curtains.


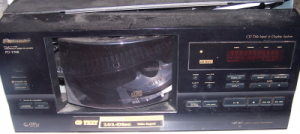
 The CD player in my Eagle Vision was slow to change tracks, didn’t seek to outer tracks, or handle my heavily scratched cd collection well… And, this finally led to some minor embarrassment – enough to drive me to fix it.


 When I got my Yamaha CA-1010 Amplifier, it worked quite well with the exception that most of the backlight did not work. I promptly tore it down, checked the power consumption of a working bulb, and replaced the bulbs with LEDs with current limiting resistors. Also, while inside, I
 sprayed the controls with contact cleaner (isopropanol based) and followed with silicon lube to stave off oxidization.


 Having worked on digital filtering using MATLAB, I’m fairly comfortable with it. I had not used the Image Processing toolbox – but, it is easily learned.


 After looking at the number of keys I had on my keyring for the same building, and making some quick comparisons, I started thinking about the possibility of generating a master key from the quite freely distributed zone keys, for academic reasons alone. This would be an interesting lesson in image processing.


